After the eclipse on August 21st, I took a deep breath. I spent a year focussed on photographing the eclipse, and with that goal complete, what was next? I was in the plateau of the Grand Teton National Park in Wyoming, a couple dozen miles from Yellowstone, and had three days to enjoy with my fiancee. As luck would have it, those days were absent of any clouds, giving me two perfect evenings in clear, dark, dry skies to do some of the best astrophotography of my life. Here’s what I shot.
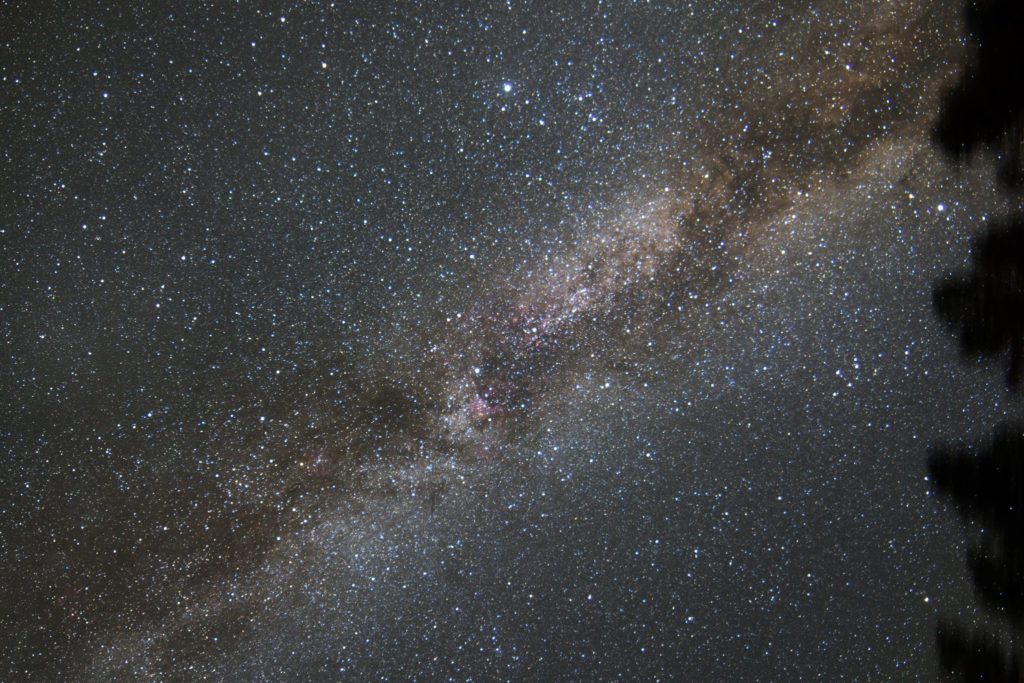
The milky way shot for me is a way to test the clarity and darkness of the sky. Any amount of moisture or light pollution in the air noticiably reduce the quality of the milky way shot. This exposure did two things: It showed just how beautiful the night sky in Wyoming was, and it let me stretch the muscles on my tracking mount, a Skywatcher Star Adventurer. Having a tracked exposure let me do a much longer shot of the galaxy at a lower ISO. This keeps the noise down since you don’t need to use ISO 6400 or higher to get the detail in the dust clouds. My favourite part of the shot is the red tinge of light from the North America nebula slightly down and left of centre. Editing really brings out the cloud bands and increases the contrast between the milky haze and the dust lanes.
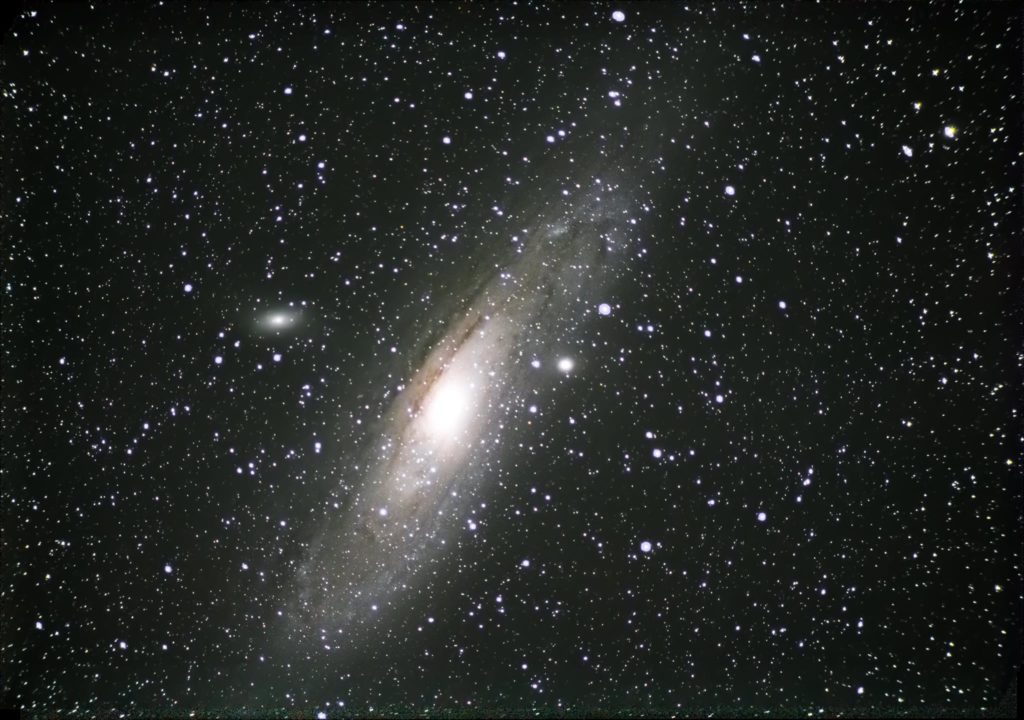
Andromeda is the crown jewel of the sky in my personal opinion. 2.5 million light years away, it is the most distant object visible to the naked eye. I used to obsess over finding it in my youth, and after many years of observing I can easily locate it by memory and star hopping. This was the first shot I took combining the tracking mount with the small telescope, which really highlights the power of the magnified power of a telescope and the advantage a tracking mount gives you. This shot doesn’t happen without either of those tools.
Finding M31 was the biggest challenge. I forgot to bring a finder scope with me, and so I had to rely on memory and skill to bring the galaxy into the telescope’s field of view. In addition I had the camera attached to the telescope and could only see what the telescope was viewing through the camera’s sensor. This meant that with the dim galaxy, all I had was a black screen, and so to place the galaxy in view, I had to point the telescope, take a 15s exposure, and then look at it to see if I was on target. If I wasn’t, I had to adjust the telescope slightly, hoping it was by the right amount in the right direction, take another image, and repeat the process. I was relatively lucky, so it only took about half an hour, before I caught the entire disk in view. Once I had it right, the tracking mount did the work of keeping it there, and I set the camera for back-to-back 30s exposures, and watched for half an hour as it gathered the data.
Taking the shots at ISO 12800 would generally be a bad thing, because a huge amount of noise was introduced. However, the full sensitivity of the chip allowed me to capture as much dim detail in the disk as possible, and staking the frames eliminates noise after the fact, so high ISO plays to the advantage in this case. After stacking, I squeezed out as much detail as possible in the disk, colour-corrected the stars, and cropped it. This is my favourite image, and the one I am most proud of.

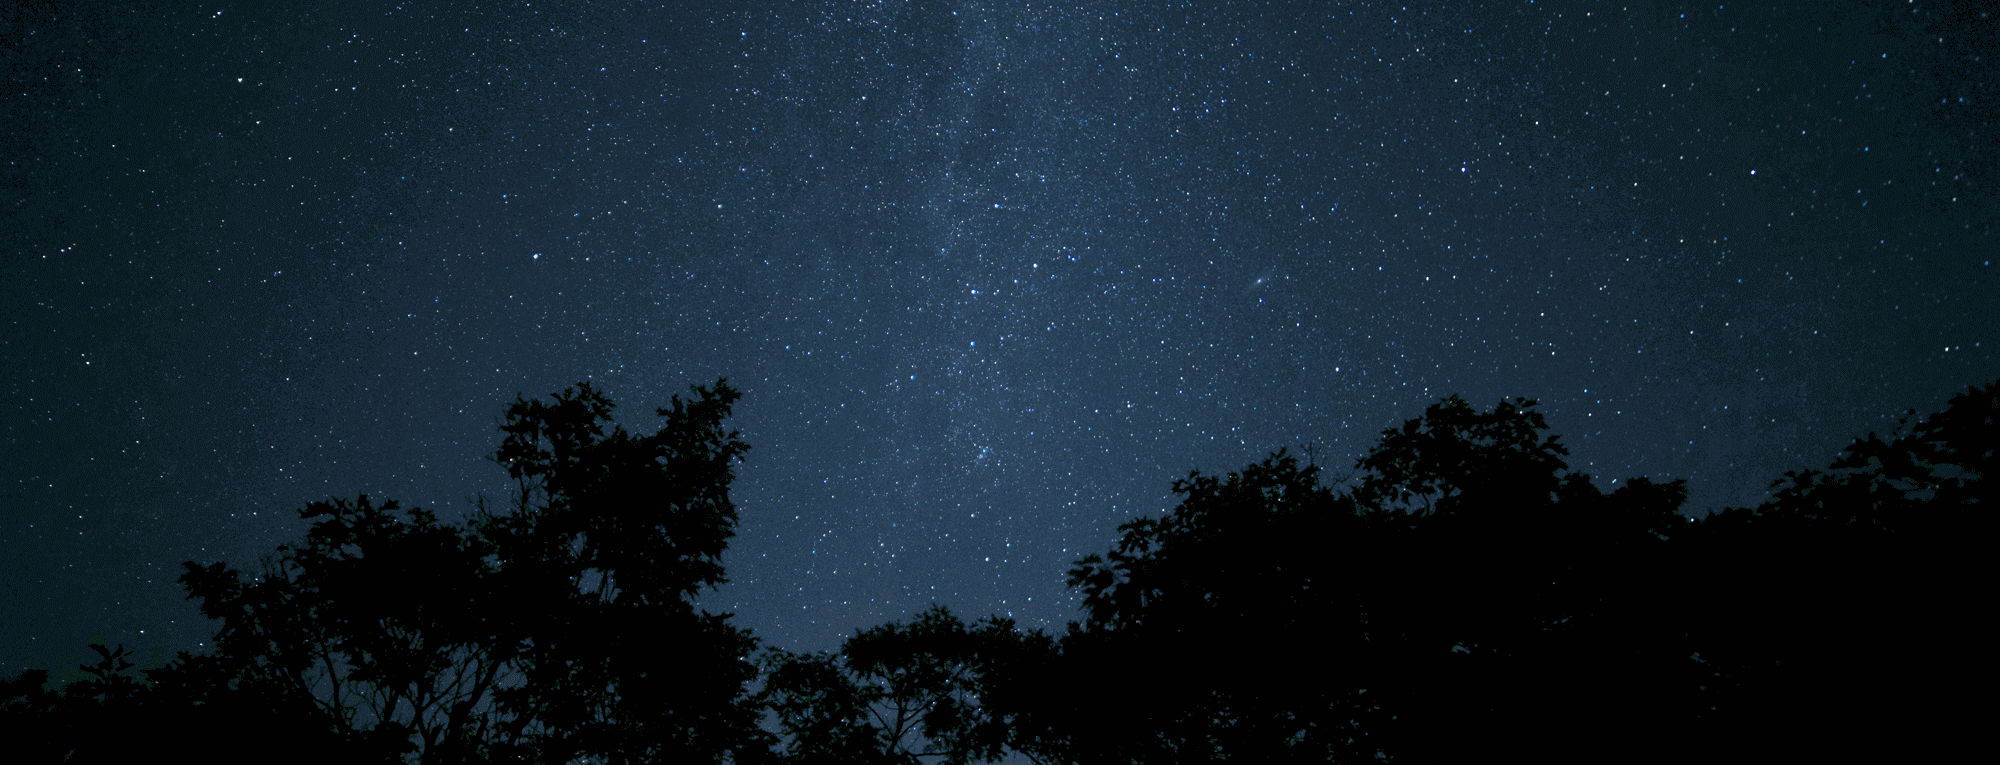
The star trail shot is the photo that almost didn’t happen. It was the last shot from the trip, and an attempt to capture as much as possible with as little effort as possible. I also had incentive as it’s my fiancees favourite type of astrophoto. This shot started at midnight, with the camera set for back-to-back 30s exposures with the wide angle lens, incorporating the ground and the north celestial pole. Once I was happy with the placement and angle, I set the camera and went to bed. For 7 hours the camera took exposures until the Sun was up. I woke up and turned it off, after taking a few extra horizon exposures for the foreground. A few hours later, we drove closer to the mountains and I took the better shots you see here, forming a panoramic shot that makes up the foreground.
In editing, I had to delete the last 200-ish photos as they were overexposed, since the Sun came up. I had 480 good shots from midnight to dawn, and meticulously combined and cleaned them one by one to get the star trails. I did a digital stitch of the foreground panorama, and pixel-by-pixel, went through to combine the foreground and background. Total editing time was about 8 hours.
Although I find I’m very critical of my work, it’s nice to see that friends I’ve shared these with enjoy them. I see imperfections, but I am still proud of them. They are the best photos I’ve taken so far in my journey through astrophotography. At this point I would call myself an intermediate, having graduated from the beginner stage with the skills to frame shots, properly expose them, use technology to capture specific objects, and edit them with the proper software. As I improve in skills and gear, I can’t wait to see the next great shot I take, and I can’t wait to waste hours upon hours under the stars to get bad shots and learn as much as I can in the process.
At least I get to spend those learning hours under clear skies.