Although the August 21st eclipse happened about 6 weeks ago, I realized it would take me a long time to edit all the photos I took during my trip. I had over 2000 individual shots of the eclipse alone, taking a single (1/4000 s) shot every 10 seconds, at ISO 100, with my telescope coming out at around f/6. I’ve done a lot of time-lapse photography before, so I thought it would be a routine shot, but I was wrong. Eclipses are much tougher to edit in terms of a time-lapse. But first, the end result of my 10 hours of editing!
I had my DSLR attached to my 4 inch refracting telescope, and mounted on a Skywatcher Star Adventurer tracking mount, all held on a lightweight tripod. I set the camera to take an exposure every 10 seconds as the mount tracked the Sun. However, there is one major problem with using a tracking mount in the daytime: You can’t align it with the North Star.
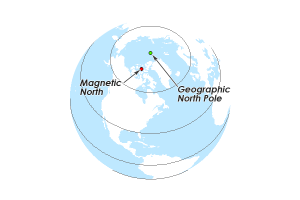
Luckily I had planned for this. All I needed was a compass and to know my latitude on the Earth.

Think about this: If you are at the North pole, the North celestial pole, and the North star, Polaris, are directly overhead at the zenith (well almost, Polaris isn’t right at the celestial pole but it’s close enough for this explanation). If you move 5 degrees in any direction on the Earth, the celestial pole will appear 5 degrees from the zenith, in the direction of due North. Same for if you move 10 degrees, 30 degrees, etc. With a bit of mathematical equivalence, this basically means that whatever your latitude is, measured from the equator, is the same as the declination angle of the North celestial pole, or how high it is above the horizon. So even in the daytime, I could know my latitude and angle the tracking mount to where the celestial pole should be.
What about the direction? This is where the compass comes in. The compass finds magnetic North, which is where the scope should point. Easy right? Well there’s a problem. Magnetic North is not the same at geometric North. Basically this means that where the compass points is not on the rotation axis of the Earth. Luckily they are close together.
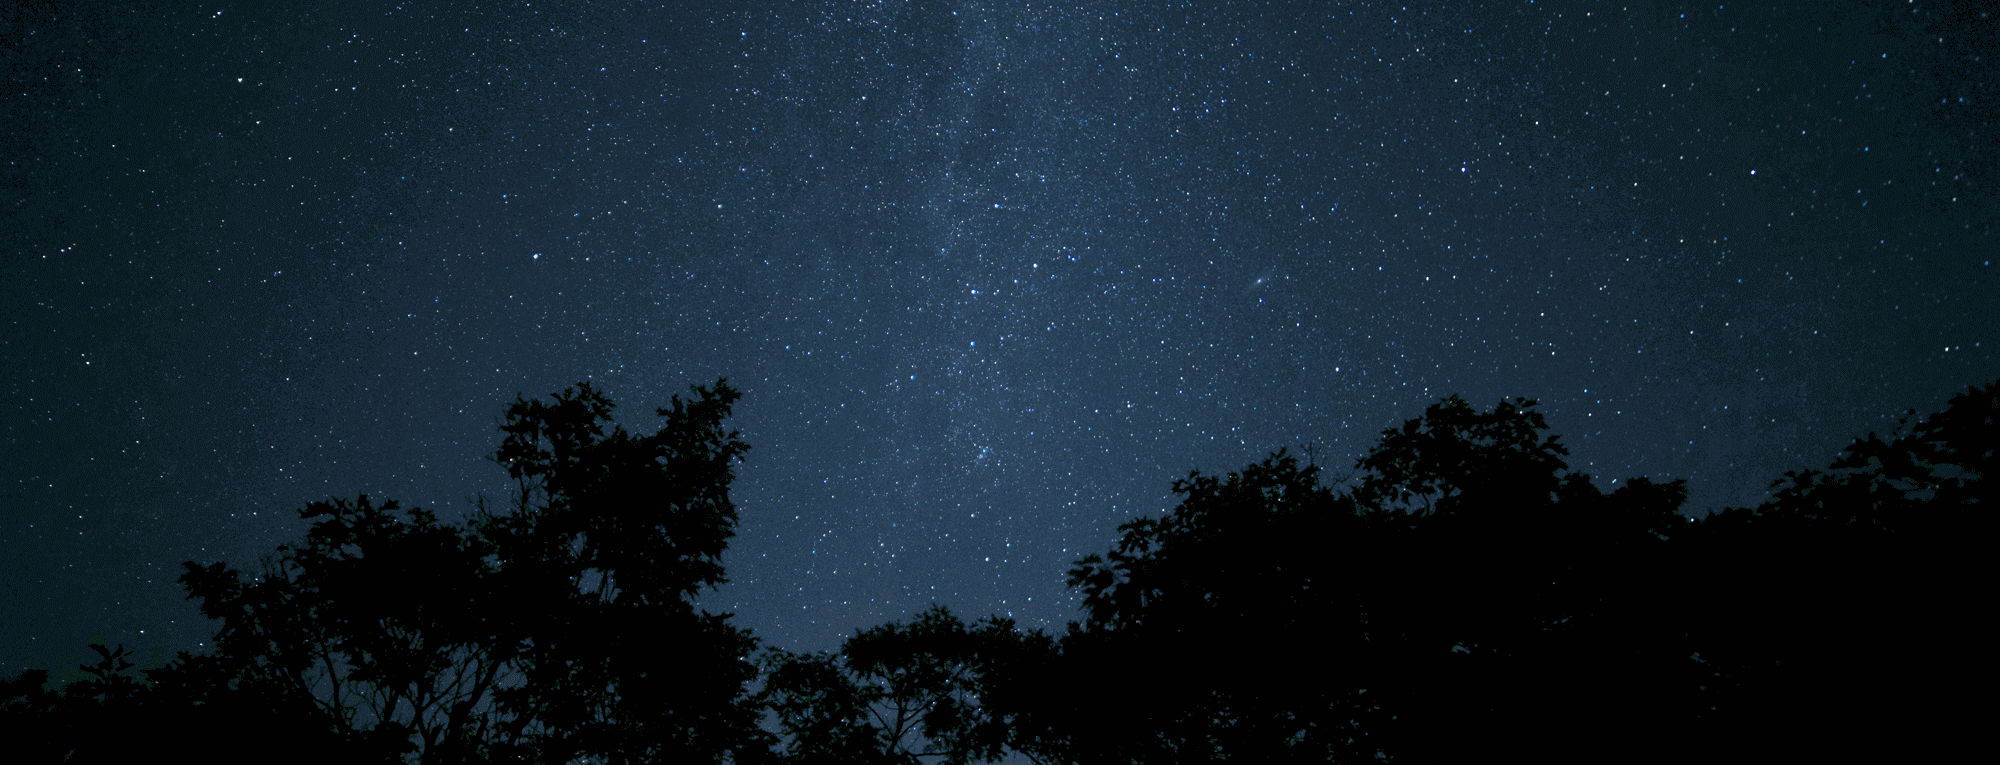
Because they aren’t the same, there is a correction involved, and there are other methods to do this. For me, as a first time eclipse observer who had used the tracking mount maybe twice before, I was content with it. The end result is that as the eclipse is being tracked, the Sun moves in the image frame, just a bit. I had to adjust the telescope once per hour to account for this, which really wasn’t a problem….until editing. You see, when taking a time-lapse, the object you’re trying to capture shouldn’t move very much, or the motion in the final video jerks around and wobbles and just looks awkward. After all, the point of time-lapse is to see how a scene evolves over a long period of time. This is why some of my favourite time-lapse shots are of big fluffy clouds.
So with the eclipse, it should stay in the same place in frame if you want to end up with a video that looks good, but remember that my tracking wasn’t perfect. So when I tried to put together the video of the eclipse at 25 frames per second, with 1 second of video = 4 minutes real-time, the video constantly moved around and looked like crap. So I was left with what most people would call a failed shot, and a hard lesson.
But I’m stubborn….
I took all of those 2000 shots of the eclipse taken 10 seconds apart, and put them into a single Photoshop document as layers. This thing took forever to save as a 4GB file, and put my new powerhouse pc to the test. A pc with a GTX 1080ti video card and a brand new AMD Ryzen 7 1700 8 core processor. I’m geeking out a bit but the file really stretched the system’s legs. I went through the file, layer by layer, frame by frame, and aligned the images. It took 5 hours of dedicated time, and it was about as exciting as you might imagine, so I spent the better part of a weekend doing it intermittently.
As with anything, the reward is getting something great after putting a lot of time and effort in. I’m glad I put in 10 hours of effort to edit the shots, align them, and edit them into a video, because I’m really happy with how it came out.
There is one more short story to tell. You may have noticed that the totality is a single image. This is due mostly to the nature of an eclipse. The entire event lasted for 3 hours, but the best part, the totality, only lasted 2 minutes and 15 seconds. Before and after totality, you’re basically looking at the Sun, and so I had a special solar filter on my telescope to allow m to safely view and photograph the eclipse as the Moon slowly passed by the Sun. But at totality, it can be viewed safely without the filter. so when photographing it, I had to quickly remove the filter, and snap as many pictures as I could of the totality phase before it ended. This is one of those shots, or rather 20 of them combined:
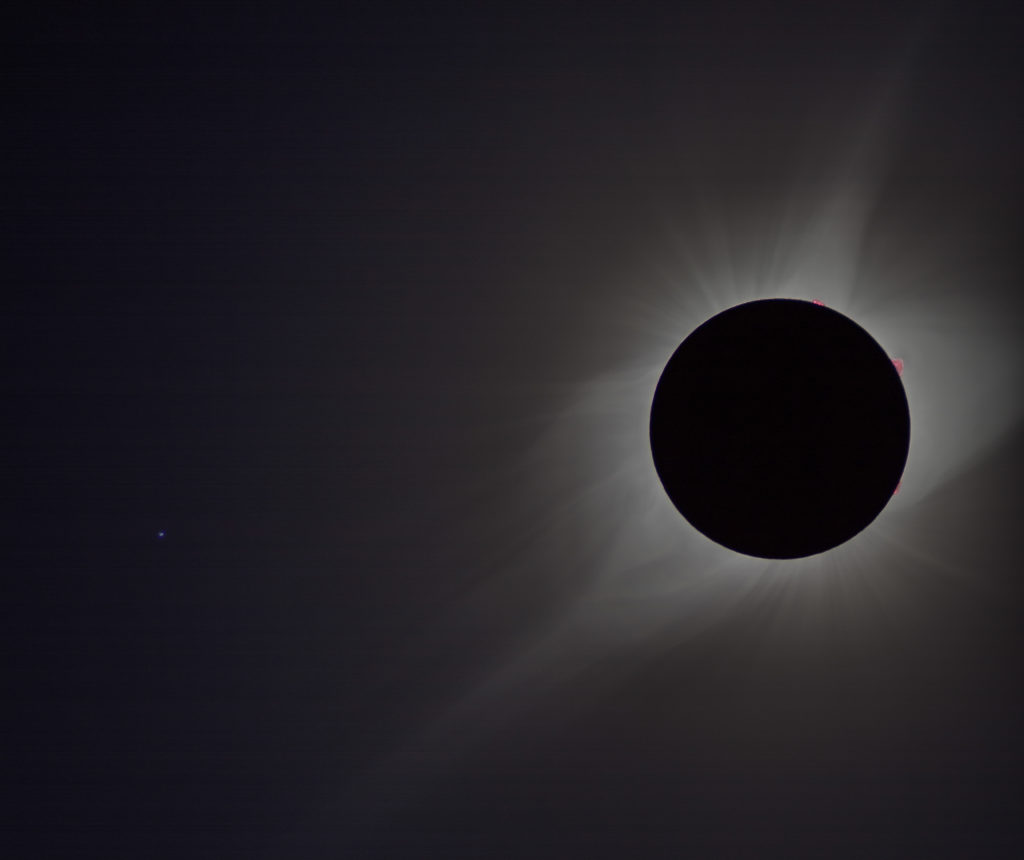
You’ll notice that the Sun-Moon combo is not centred in the frame. This is because in all my haste to remove the filter and actually enjoy the eclipse, I didn’t get around to realigning the camera and telescope. So all of my shots of totality had part of the Sun’s corona cut off. I would be more upset about it if I wasn’t happy with the photos I did take. So in the time-lapse video, I ended up taking a low exposure shot of the corona so it wouldn’t look too cut off in the video.
All in all I was really happy with the shots I took, and it was worth the effort to edit them. I’m still reaping the rewards, as I have a few more composite shots to make. I learned a lot about astrophotography in my first total solar eclipse experience, and would do it all again in a heartbeat.
One thought on “The Trials of Solar Eclipse Photography”